Helpful Hints Basic Welding
Basic Stick Welding – Tools & Techniques
Equipment and Tools
In stick welding, the equipment and tools that are required are:
- power source welding machine – complete with welding cable, electrode holder and ground cable and clamp
- chipping hammer or chisel, and a wire brush (for removing slag)
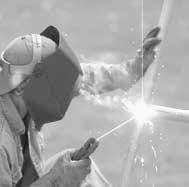
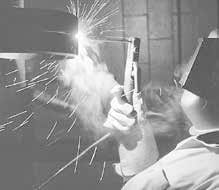
- protective clothing including helmet and gloves
Helpful Hint #3
If you have to use an extension cord to get power to your welding equipment, make sure the cord is the correct size to carry the current from the outlet to the power supply!

Repairing farm fencing in the field using Hobart’s 418 stick electrodes
Techniques
To produce a good quality weld, it is important to master the following stick welding techniques. the first thing you should do before you start welding is make sure the workpiece – the item you are welding – is as clean as possible. Use a clean cloth, wire brush or sandpaper to remove any rust, dirt, paint, grease, oil or other contaminant. Do not use cleaning solvents because you can run the risk of an explosion or fire, or illness from toxic vapors.
Helpful Hint #4
Be sure to connect the ground clamp of your welding equipment to the workpiece before you start welding!

Great for many applications, Hobart 18AC features a smooth, stable arc and offers excellent re-striking capabilities.
Setting the Amperage
Select the proper amperage based on the specifications of the stick electrode. Sometimes, you may find that you have to “fine tune” the setting so that the electrode melts properly. The best way to check this is to perform some test welds on some scrap metal and look at the weld. If you notice that the weld is…
- piling up or you see signs of burn-through (holes in the base metal), then the amperage is probably set too high;
- not penetrating the joint (little depth) or not fusing to the workpiece (doesn’t cover joint walls) properly, then the amperage is probably set too low.


